I love Google Voice. For a couple of years now, I have used it to coordinate my business phone calls. I give out the Google Voice number, and it is set up to ring both my home phone number and my cell phone. If I'm at home, I know instantly that it's a business call (because both phones are ringing), and I can pick it up on the landline - which doesn't cost me any minutes. If I'm not at home, I don't miss the call!
I only just recently discovered that Google Voice also does text messages. This has been wonderful, since I have to send a lot of text reminders to my cub scout den. Now, I can type them in on a full-size keyboard! My cell phone is a pay-as-you-go, so this also saves me a lot of $. Sending texts through Google Voice is free, and the replies go to my cell phone (as text) and to my gmail account. I can even reply to text messages using my gmail account (I haven't found a way to initiate them from gmail, however)! The only drawback is that I can only send a text to 5 people at a time, but that's still better than my cell phone can do!
If you already have a Google account, signing up for Google Voice is quite easy. Just go to www.google.com/voice and select your account. You will be prompted to choose an phone number for your Google Voice, and then you just have to select your options. You can look at some of the many features here.
My husband also has a Google Voice account. One of his favorite features is the email transcription of voice messages - all his voice messages show up in the email inbox!
Wednesday, August 13, 2014
Saturday, July 12, 2014
Southern Living: Lessons From a Decade Ago Part 1
It's taken a decade, but I've finally made it back to the south! With our family's recent move from Ohio to Virginia, we're experiencing life deep-fried again, and I'm remembering some lessons from my Southern past that can enrich a Westerner, Easterner, or Southerner alike.
1. Hills
The South is chock full of 'em. Which makes everything more exciting: biking, jogging, walking. I have a love-hate relationship with hills. Going up I hate 'em. Coming down I love 'em. On the uphills I try to remember some good advice my friend and running buddy, Jenni (Holmes) Hirschi in Tennessee would tell me. When you're going up a hill, just look down at the ground and keep moving. Don't fix your eyes on top of the hill.. Just keep looking down and keep moving, and you'll make it. Then you can enjoy the view from the top. Jenni even had some little song we'd sing on the way up a hill, but since it's been ten years, I can't remember it now.
The South ain't the only thing full of hills. Life is too. In church lingo you might hear them called trials, tribulations, challenges. In practical terms I might call it the moment my baby is crying to be held, my 3 year-old is streaking poop across the floor as he tries to potty himself, and my oldest two are fighting over ninja toys. That's the moment that I'm biking uphill and it ain't easy. But do I throw down the bike and scream at the hill "How can you be so inconsiderate! I'm just trying to bike here, and you're making it so difficult!" Hopefully not. And hopefully I don't throw down the baby and scream at the kids, "How can you be so inconsiderate! I'm trying to mother here, and you're making it so difficult!"
Because it isn't until you've made it up the hill, that you get the splendid view from the top.
1. Hills
The South is chock full of 'em. Which makes everything more exciting: biking, jogging, walking. I have a love-hate relationship with hills. Going up I hate 'em. Coming down I love 'em. On the uphills I try to remember some good advice my friend and running buddy, Jenni (Holmes) Hirschi in Tennessee would tell me. When you're going up a hill, just look down at the ground and keep moving. Don't fix your eyes on top of the hill.. Just keep looking down and keep moving, and you'll make it. Then you can enjoy the view from the top. Jenni even had some little song we'd sing on the way up a hill, but since it's been ten years, I can't remember it now.
Scott and Eric putting the just-look-down-and-keep-going in to action.
Guess you can get so caught up in that, you don't realize your pants are falling down!
The South ain't the only thing full of hills. Life is too. In church lingo you might hear them called trials, tribulations, challenges. In practical terms I might call it the moment my baby is crying to be held, my 3 year-old is streaking poop across the floor as he tries to potty himself, and my oldest two are fighting over ninja toys. That's the moment that I'm biking uphill and it ain't easy. But do I throw down the bike and scream at the hill "How can you be so inconsiderate! I'm just trying to bike here, and you're making it so difficult!" Hopefully not. And hopefully I don't throw down the baby and scream at the kids, "How can you be so inconsiderate! I'm trying to mother here, and you're making it so difficult!"
Because it isn't until you've made it up the hill, that you get the splendid view from the top.
View from the top of a 2 mile uphill hike
Thursday, July 10, 2014
Man Toy Project Ideas
I just came across a great website called SonicDad.com The site is run by three Dads, who have created 61 (and counting) do-at-home Man Toy projects. Things like mini crossbows, binder clip catapults, golf ball tops, paper airplane launchers. You get the idea. Best of all, these projects are made from inexpensive things you probably have around the house already!
The most basic projects - SimpleSonic projects - are free. To get plans for the others, you need a paid subscription ($3.99 for a single project of $24.99 for a year of use), but at the very least, you can get some great ideas from some very creative Dads!
(These pictures are taken directly from SonicDad.com - check them out for a whole lot more!)
The most basic projects - SimpleSonic projects - are free. To get plans for the others, you need a paid subscription ($3.99 for a single project of $24.99 for a year of use), but at the very least, you can get some great ideas from some very creative Dads!
(These pictures are taken directly from SonicDad.com - check them out for a whole lot more!)
Wednesday, June 18, 2014
Easy Stove Grate Cleaning
I hate cleaning my stove - all of that built on grease takes a lot of Comet and elbow grease to come clean. So - I thought I'd share a cleaning shortcut that I just learned.
First, put on rubber gloves. Now, take your stove grates and drip pans and place them in a doubled large trash bag. Now, add about 1/3 to 1/2 cup ammonia ($1.12 in Walmart's cleaning department). Close the bag securely, and let it sit overnight. (You may want to put it outside somewhere, in case some of the ammonia manages to leak out.).
In the morning, dump out the ammonia and trash the bags. Now, wipe off the grease. It really is almost that easy - I added a little elbow grease and got a bit more off. There's still a little build up on the grates, in places where it was really deep. I'm sure that another round with the ammonia would take it off, too, but I'll wait until next time. For now, they're cleaner than they've been in a very long time.
First, put on rubber gloves. Now, take your stove grates and drip pans and place them in a doubled large trash bag. Now, add about 1/3 to 1/2 cup ammonia ($1.12 in Walmart's cleaning department). Close the bag securely, and let it sit overnight. (You may want to put it outside somewhere, in case some of the ammonia manages to leak out.).
In the morning, dump out the ammonia and trash the bags. Now, wipe off the grease. It really is almost that easy - I added a little elbow grease and got a bit more off. There's still a little build up on the grates, in places where it was really deep. I'm sure that another round with the ammonia would take it off, too, but I'll wait until next time. For now, they're cleaner than they've been in a very long time.
Saturday, March 22, 2014
Reunion Recipes!
Well, it's not real pretty, but here ya go! The recipes from our fantastic family reunion!
Baked Oatmeal with Fruit
I'm just going to send you to the blog I got the recipe from, because they have a ton of other great freezer friendly recipes as well.
http://thrivinghomeblog.com/2012/03/baked-oatmeal-a-staple-in-our-home/
Egg-Sausage Casserole
Recipe from Julie Dallas (lady I nannied for in Columbus)
Refried Beans
(can't find the site I originally got the recipe from)
Baked Oatmeal with Fruit
I'm just going to send you to the blog I got the recipe from, because they have a ton of other great freezer friendly recipes as well.
http://thrivinghomeblog.com/2012/03/baked-oatmeal-a-staple-in-our-home/
Egg-Sausage Casserole
Recipe from Julie Dallas (lady I nannied for in Columbus)
- 6 eggs, slightly beaten
- 6 slices cubed bread
- 1 c. sharp Cheddar cheese, grated
- 1 tsp. salt
- 1 T. dry mustard
- 1 lb. pork sausage, browned and drained
- 2 c. milk
Blend all ingredients and pour into a 13 x 9 inch baking dish. Refrigerate overnight. Preheat oven to 350. Bake 45 minutes, uncovered. OR blend all ingredients and put in a crockpot overnight on low. (Be prepared to have a sticky mess on the sides of the crockpot. You choose if sleeping in the next morning is worth washing the dish afterward!)
Breakfast Burritos
Recipe from Miriam Lemon
- 1 Bunch Green Onions
- 3 Tomatoes
- 1 Bunch Cilantro
- 10 Flour Tortillas
- 1 lb Sausage
- 1 dozen Egg
- 1 Cup Grated Cheddar Cheese
- 1 Can Beans
Cook sausage. Saute green onions and tomatoes in frying pan. Add eggs, cheese, and sausage. Cook until eggs are barely scrambled. Serve on tortillas. If making it a freezer meal, just put cooked mixture in freezer bags and have tortillas on hand the deay you want to eat them!
Carrot-Pineapple Muffins/Bread
- 1 c. sugar
- 2 eggs
- 1 1/2 c. flour
- 1 c. grated carrot
- 1 tsp. baking powder
- 1 tsp. baking soda
- 1/2 tsp. salt
- 1 tsp. cinnamon
- 2/3 c. oil
- 1 tsp. vanilla
- 1/2 c. drained crushed pineapple
Beat eggs and sugar. Add remaining ingredients and beat well. Fill greased muffin tins 3/4 full. Bake at 350 degrees for 25 minutes. Yields 12. Can double or quadruple and freezes well. (or octagonal the recipe - octopulet it. . . how do you even SAY that, much less COOK that?)
Flatlander Chili
From allrecipes.com
INGREDIENTS:
2 pounds lean ground turkey
1 (46 fluid ounce) can tomato juice
1 (29 ounce) can tomato sauce
1 1/2 cups chopped onion
1/2 cup chopped celery
1/4 cup chopped green bell pepper
1/4 cup chili powder
2 teaspoons ground cumin
|
1 1/2 teaspoons garlic powder
1 teaspoon salt
1/2 teaspoon ground black pepper
1/2 teaspoon dried oregano
1/2 teaspoon white sugar
1/8 teaspoon ground cayenne pepper
2 cups canned red beans, drained and
rinsed
|
DIRECTIONS:
| 1. | Place ground turkey in a large, deep skillet. Cook over medium-high heat until evenly brown. Drain, crumble, and set aside. |
| 2. | Add all ingredients to a large kettle. Bring to boil. Reduce heat and simmer for 1 to 1 1/2 hours, stirring occasionally. |
Chicken Waikiki
From Margie Hill, our adopted Columbus grandma
- 4 Chicken Breasts
- 1 Can (1lb 4 oz.) Pineapple chunks
- 1 Large green pepper
- FOR SAUCE:
- 1 cup sugar
- 2 TBSP cornstarch
- 1/2 cup cider vinegar
- 1 Tbsp soy sauce
- 1/4 tsp ground ginger
- 1 chicken bouillon cube
- Reserved pineapple juice with enough water added to make 1 1/4 cups total
Bake 4 chicken breasts in the oven until done (or on stovetop), then shred in large pieces and put in the bottom of a baking dish. Drain 1 can pineapple chinks, reserving liquid, and place the pineapple in the baking dish with the chicken. Slice one large green pepper and place on top of the pineapple.
For sauce, bring sugar, cornstarch, cider vinegar, soy sauce ,ginger, and bouillon cube to a boil, stirring constantly. Boil 3 minutes.
Pour the sauce into the baking dish to cover the chicken, pineapple, and green pepper. Cover the baking dish with a lid. Bake 30 minutes at 350 degrees. (Or if freezing, put in dish and freeze. Then bake on eating day.)
For sauce, bring sugar, cornstarch, cider vinegar, soy sauce ,ginger, and bouillon cube to a boil, stirring constantly. Boil 3 minutes.
Pour the sauce into the baking dish to cover the chicken, pineapple, and green pepper. Cover the baking dish with a lid. Bake 30 minutes at 350 degrees. (Or if freezing, put in dish and freeze. Then bake on eating day.)
Cafe Rio Crockpot Chicken
From Nancy originally I think?
- Chicken
- 5 lbs chicken breast, boneless, skinless
- 1 small bottle of zesty Italian dressing
- 1 tbsp chili powder
- 1 tbsp cumin
- 3 cloves garlic, minced.
Mix all ingredients together in a large crockpot. Cook on low for 5-7 hours. Remove chicken and shred with fork. Reserve a small amount of juice and pour over shredded chicken to keep moist. Keep warm.
(can't find the site I originally got the recipe from)
• 4 cups cooked pinto beans (You may used canned whole beans if you like. I prefer to use dry beans and cook them myself. Directions follow below.)- • 3 T. healthy fat for sauteing (Butter, coconut oil, beef tallow, or lard would all work here. Avoid olive oil as it isn’t stable at high temperatures.)
- • 1 cup chopped onion
- • 5 cloves minced garlic
- • 2 1/2 t. cumin
- • 2 t. paprika
- • 2 t. sea salt
- • 1/2 t. chili powder (more or less- the intensity of chili powders seems to vary)
- • 1/2 t. black pepper
- • Milk, as needed (water or bean broth can be used if your family is dairy-free. However, I prefer the richness that the milk adds.)
To prepare dry beans, place the beans in a large bowl, cover with an ample amount of water and allow to soak overnight. (Keep in mind that 1 cup of dry beans equals approximately 3 cups of cooked beans).
The next day, drain and rinse the beans. Cover them generously with fresh water and simmer for several hours or until tender. A slow cooker works wonderfully for this as well! I like to make up a big batch of beans and freeze the leftovers in 2 cup portions.
In a large pot or saucepan, saute the onions in the fat until they are soft and translucent.
Add the minced garlic and cook for 1-2 minutes more.
Add the beans. If your beans are without liquid, you may need to add extra water or milk at this point. (I prefer to leave a little of the bean broth in with the beans when I freeze them.)
Stir in the cumin, paprika, salt, chili powder, and black pepper.
Bring to a slow simmer and allow it all to cook on low heat for 10-20 minutes, stirring occasionally.
If the mixture is dry, you may need to thin it with a splash of milk or water at this point. However, if you started out with extra liquid in your cooked beans, you may not need to add anything.
Once the beans have cooked down for a while and the flavors have had time to incorporate, mash them with a potato masher, fork, or my personal favorite: an immersion blender. I prefer slightly chunky beans, versus a super-smooth “puree” consistency.
Serve with tacos, burritos, or alongside chips as a dip. One of our favorite ways to eat refried beans is to make simple bean quesadillas with homemade tortillas, cheddar cheese, and dipped in sour cream.
The next day, drain and rinse the beans. Cover them generously with fresh water and simmer for several hours or until tender. A slow cooker works wonderfully for this as well! I like to make up a big batch of beans and freeze the leftovers in 2 cup portions.
In a large pot or saucepan, saute the onions in the fat until they are soft and translucent.
Add the minced garlic and cook for 1-2 minutes more.
Add the beans. If your beans are without liquid, you may need to add extra water or milk at this point. (I prefer to leave a little of the bean broth in with the beans when I freeze them.)
Stir in the cumin, paprika, salt, chili powder, and black pepper.
Bring to a slow simmer and allow it all to cook on low heat for 10-20 minutes, stirring occasionally.
If the mixture is dry, you may need to thin it with a splash of milk or water at this point. However, if you started out with extra liquid in your cooked beans, you may not need to add anything.
Once the beans have cooked down for a while and the flavors have had time to incorporate, mash them with a potato masher, fork, or my personal favorite: an immersion blender. I prefer slightly chunky beans, versus a super-smooth “puree” consistency.
Serve with tacos, burritos, or alongside chips as a dip. One of our favorite ways to eat refried beans is to make simple bean quesadillas with homemade tortillas, cheddar cheese, and dipped in sour cream.
Thursday, February 20, 2014
What kind of CHICKEN are you?
At a recent Young Women activity (girls from our church that are 12-18) we made white chicken chili. It was interesting that not ONE of the girls would touch the pile of cooked chicken legs ready to be deboned and deskinned. Not one. Maybe the act of pulling bone from muscle just made the chicken a little too . . . alive . . . in their mind.
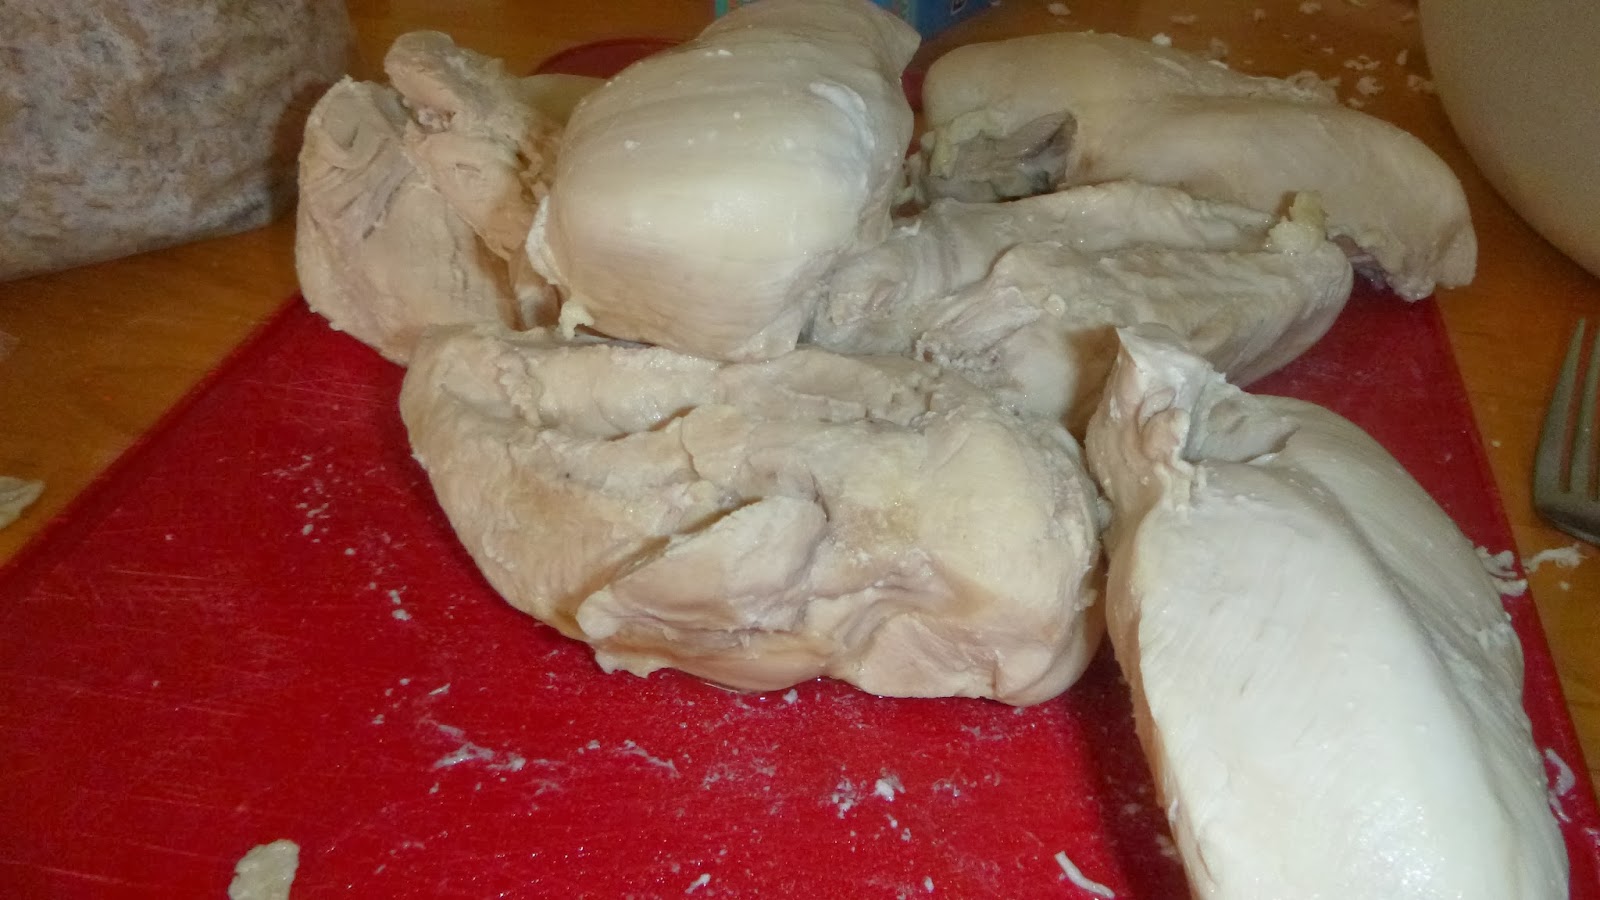
I've found that there are those people who are the classic boneless/skinless type. Won't touch a full-fledged turkey carcass with a ten foot pole. And I've got to say there are times when boneless/skinless is definitely the way to go. For instance when you have 60 lbs of chicken to cook and put in the freezer for an upcoming family reunion. Boneless skinless is the only way to go. Why? Two words: KITCHEN AID! Mom (mother of all things frugal here) recently showed me that you can put cooked boneless/skinless chicken breasts in the kitchen aid with a regular mixer attachment, turn it on low, and come back 10 seconds later to perfectly shredded chicken. LIFE CHANGER!!
But I've got to give it to the good ole split chicken breast. Cheaper. On sale I can get it for about $1.29 versus a sale of $1.59 for boneless/skinless.** And then you add on the extra money you save from not having to buy chicken broth. You can simply put some onions, carrots, celery, salt, and a bay leaf into the cooking water and when you're done cooking that chicken you've got a beautiful chicken broth ready to be strained and stored for your next soup.
So what kind of chicken are you? Boneless, skinless or split chicken breast?
I've found that there are those people who are the classic boneless/skinless type. Won't touch a full-fledged turkey carcass with a ten foot pole. And I've got to say there are times when boneless/skinless is definitely the way to go. For instance when you have 60 lbs of chicken to cook and put in the freezer for an upcoming family reunion. Boneless skinless is the only way to go. Why? Two words: KITCHEN AID! Mom (mother of all things frugal here) recently showed me that you can put cooked boneless/skinless chicken breasts in the kitchen aid with a regular mixer attachment, turn it on low, and come back 10 seconds later to perfectly shredded chicken. LIFE CHANGER!!
But I've got to give it to the good ole split chicken breast. Cheaper. On sale I can get it for about $1.29 versus a sale of $1.59 for boneless/skinless.** And then you add on the extra money you save from not having to buy chicken broth. You can simply put some onions, carrots, celery, salt, and a bay leaf into the cooking water and when you're done cooking that chicken you've got a beautiful chicken broth ready to be strained and stored for your next soup.
So what kind of chicken are you? Boneless, skinless or split chicken breast?
For the Kitchenaid shredded chicken tip start with cooked boneless, skinless chicken breasts.
Put them in the Kitchenaid with the regular cookie dough attachment on lowest speed. Mix for about a minute until they are shredded to your desired shreddidness. :-)
Put in freezer bags in serving size portions and save for a busy night.
**Boneless/skinless chicken breasts were on sale at our Aldis (aldi.com) for $1.59 this week. (Sorry Utah people, Aldis is global, but hasn't made it's way over the Rockys yet.) Aldis is a great cheap option if you're willing to bag your own groceries and all that jazz, which I am. But I have to say I could have kissed the cashier when she offered to help put groceries on the belt and back into the cart. Maybe it was the shopping cart exploding with 60 lbs of chicken breast, 7 gallons of milk, 30 lbs of potatoes, 4 dozen eggs, etc. etc. along with Baby Boy asleep in a carrier on my chest, Helper Girl, Big Boy, and Buddy Boy that prompted the act of kindness. Made my day! That and the cable repair guy who stopped to help me shovel my van out of my own driveway when it got stuck hanging out onto Main Street because I couldn't get all those pounds of groceries and kids over the snow-covered driveway. Still lots of good in this world!Thursday, February 6, 2014
Laundry Detergent - Good to the Last Drop
I've noticed that with those nice pour spouts lots of liquid detergent gets stuck in the bottle. I estimate it's 1 wash load worth of detergent per bottle. So lazy me I had three small detergent bottles that were almost empty. (I usually buy bigger bottles for the better per ounce price, but these were buy this/get that type sale so they were a good deal.)
Options for getting the last drop of laundry detergent:
Another option would be to put water into the bottle and then pour the diluted detergent into the washing machine. Probably a lot less work, but sometimes I just do things my own way. :)
Options for getting the last drop of laundry detergent:
- cut the bottle in half and put the whole bottle in the washing machine
- drain the bottle upside down
- poke a hole in the bottle and drain it
Another option would be to put water into the bottle and then pour the diluted detergent into the washing machine. Probably a lot less work, but sometimes I just do things my own way. :)
| Prop in the morning and Leave till Lunch |
Subscribe to:
Posts (Atom)